This process is really broken down into two steps:
1. Locate and download a new visualization for iTunes
2. Move (or copy) the new visualization to the iTunes folder
There are several places to begin searching for new visualizations; an easy first choice is Google, followed by Apple's Downloads section. When one or more visualizations have been downloaded, it is time to move (or copy) them to the iTunes folder, in a specific place. The path to use is:
All new visualizations need to be placed within this folder. If iTunes was running, quit and relaunch the application, and the new visualizations should be available to select from the Visualizer menu, as can be seen in the image below:
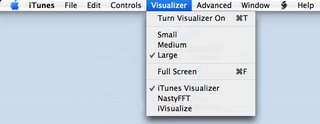
Have fun and see what else is available; I've been really enjoying one called NastyFFT, a great real-time, colour-switching spectrum analyzer...
Keep in mind that using the path provided above installs the new visualizations for the active user only, and not every user on the system. In order to have visualizations available to every user, move (or copy) the visualizations to the following folder:
In our next installment, we will explore some options available using playlists and smart playlists!


No comments:
Post a Comment